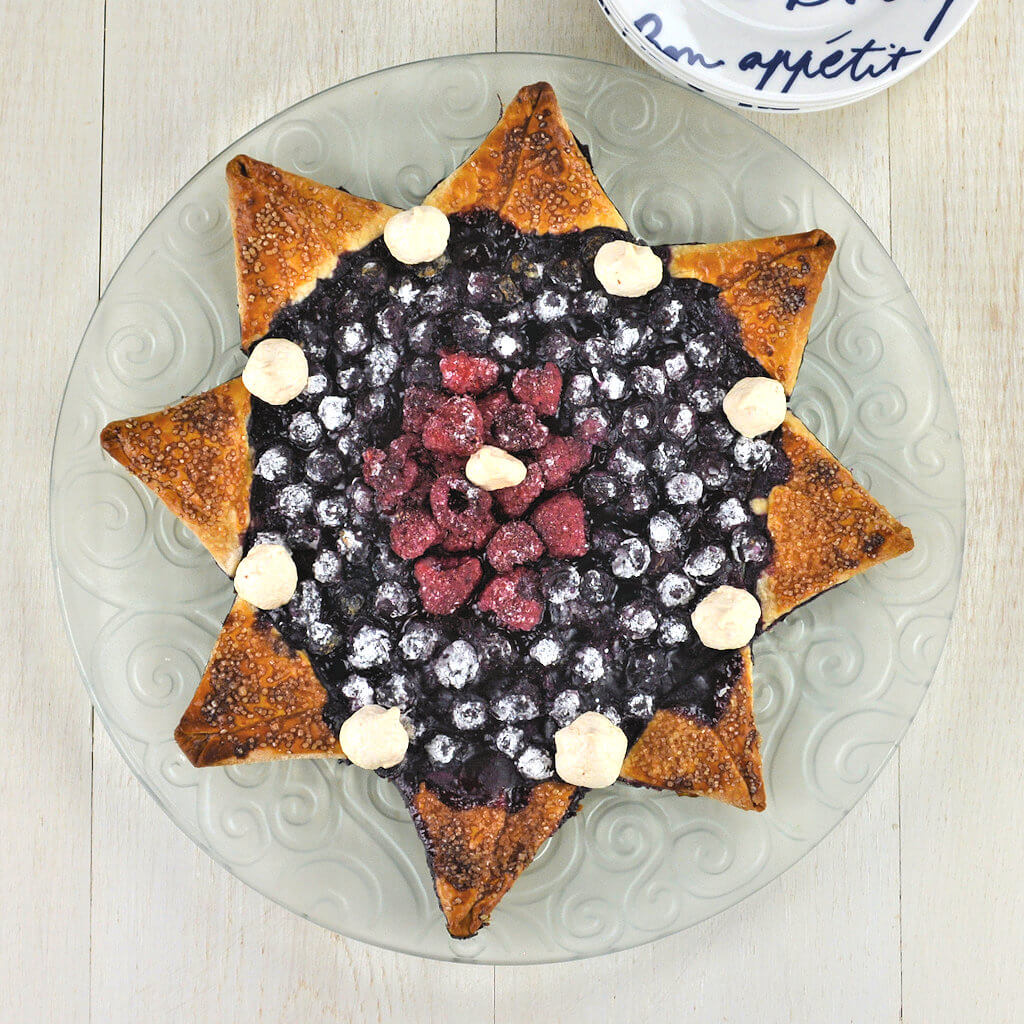
The outer ring of the pie crust is cut and folded into points, creating the star shape that sets this apart from any standard small pie. Inside, blueberries and raspberries cooked with sugar, blueberry syrup, and cornstarch into a jammy, glossy filling. After baking, meringue rosettes made from egg white, sugar, cream of tartar, and vanilla are piped across the top. The white against the deep red and blue beneath completing the picture.
This is a small-batch pie baked on a sheet pan rather than in a pie dish, which is what makes the star crust achievable. Two people, one spectacular pie, and a presentation that earns its occasion, whatever that occasion happens to be.
This post may contain affiliate links, which means that I make a small commission off items you purchase at no additional cost to you.
Key Ingredients in This Recipe
You’ll find the complete list of ingredients and exact quantities in the recipe below.
- Pie crust – store-bought or homemade
FOR THE FILLING
- Blueberries
- Raspberries
- Granulated sugar
- Blueberry syrup – or jelly
- Corn starch
- Turbinado sugar
FOR THE MERINGUE ROSETTES
- Egg white
- Granulated sugar
- Cream of tartar
- Vanilla extract
How to Make Blueberry Raspberry Star Pie
Not difficult at all; just a little bit of paper craft or ‘kindergarten’ play with paper. Better try these things with paper, than with dough. Here you go: cut a circle, fold it in half, fold the half moon in half and fold the quarter in half and you’ll end up with a cone shape. Now cut 1.5 inches into the wide part of the cone, towards the tip. Cut through all the layers. Unfold and you have a circle with 8 cuts evenly spaced. Place this template on you pie dough and make the cuts in the dough.
Each part of dough between 2 cuts becomes a point of the star. Take the points and fold them towards each other, with a little bit of overlap. “Glue” them together with a beaten egg. Repeat and your star is complete.
Wash the blueberries and raspberries and place them in a colander to drip dry. Dry with a (paper) kitchen towel. Mix the blueberries with sugar and cornstarch. Cover the bottom of the pie with some blueberry syrup, but leave approx. 1 inch of the outside of the bottom uncovered. Place the blueberry mix on the syrup, but leave a little opening in the center and place the raspberries in that spot.
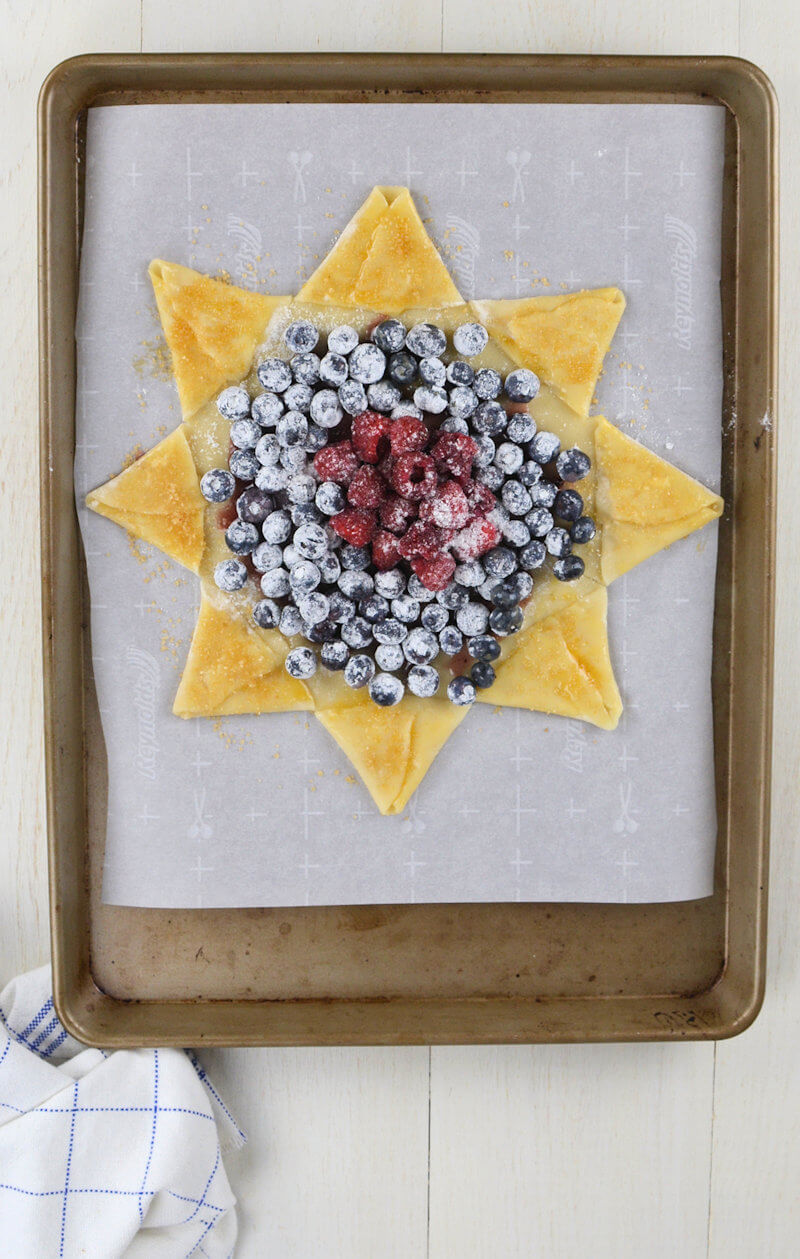
In this close-up, you see the outer border of the pie and the folded star points. Each point is brushed with beaten egg and sprinkled with sugar. The border will fill up once the pie bakes.
It will actually more than fill up, it will overflow. As you can see in the picture below. So once the pie is cooled, you’ll need to do some trimming.
It overflows a little, because there is no border keeping the juices on the pie bottom. Normally when you bake a fruit pie you will fold the crust or when you use a pie dish, the edges will go up, preventing most of the juices to spill out of the pie. With this Blueberry Raspberry Star Pie that’s not possible, because it is all flat. On the other hand; I did bake it relatively short, used about half the amount of fruit than I would have done in a ‘normal’ pie. This did help in avoiding mushy berries and a limited amount of juice running away.
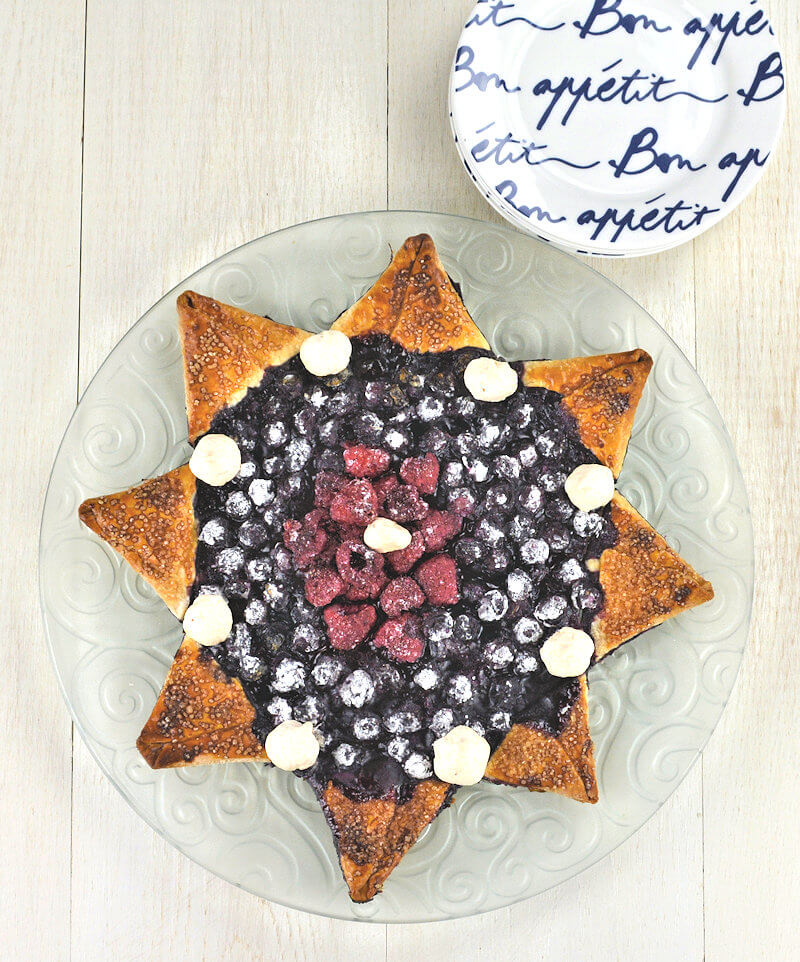
This Star Pie was quick and it is light (again half the amount of filling). Gone in 2 days. Try and enjoy!
Blueberry Raspberry Star Pie
Pin Recipe Facebook Share by TextIngredients
- 1 pie crust, store-bought
- 1 cup blueberry
- 1/2 cup raspberry
- 1 tablespoon sugar
- 2 tablespoons blueberry syrup
- 1 tablespoons corn starch
- 2 tablespoon turbinado sugar
- 1/2 egg
Meringue Rosettes
- 1 egg white
- 1/4 cup sugar
- 1 pinch cream of tartar
- 1/8 teaspoon vanilla extract
Instructions
- Heat oven to 425°F. Line a baking sheet with parchment paper, large enough to accommodate a 9-inch pie.
- Wash the blueberries and raspberries and place them in a colander to drip dry.
- In a bowl, mix the blueberries, sugar and cornstarch.
- Unroll the pie crust and prepare the crust, by cutting the outside rim of the dough 8 times, evenly spaced. Then fold 2 flaps toward each other, until the sides meet, creating a triangle with the tip facing up. Repeat this 8 times and you’ll have a star. You can use a paper template to work faster.
- Spread the blueberry syrup evenly over pie crust. leaving a 2 inch border. Top with the blueberries, leaving a spot in the center for the raspberries. Add the raspberries
- Brush star points of the crust with beaten egg and sprinkle with turbinado sugar.
- Bake the pie 15-20 minutes in the oven or until golden brown and allow to cool before serving.
Make the meringue.
- In a small bowl, combine egg whites, vanilla extract and cream of tartar and beat until foamy. Slowly add the sugar until you have stiff peaks.
- Transfer meringue to a piping bag and create tiny decorations on a baking sheet lined with parchment paper. You most likely will have to many rosettes for just 1 pie, unless you want to place more on the pie than I did.
- Bake small meringues in a heated oven of 225°F. and bake for approx. 15-20 minutes or until meringue is dry on the outside and allow them to cool and dry inside the oven.
- Place the meringue decorations on the pie and serve.
Nutrition
Nutrition information is automatically calculated, so should only be used as an approximation.