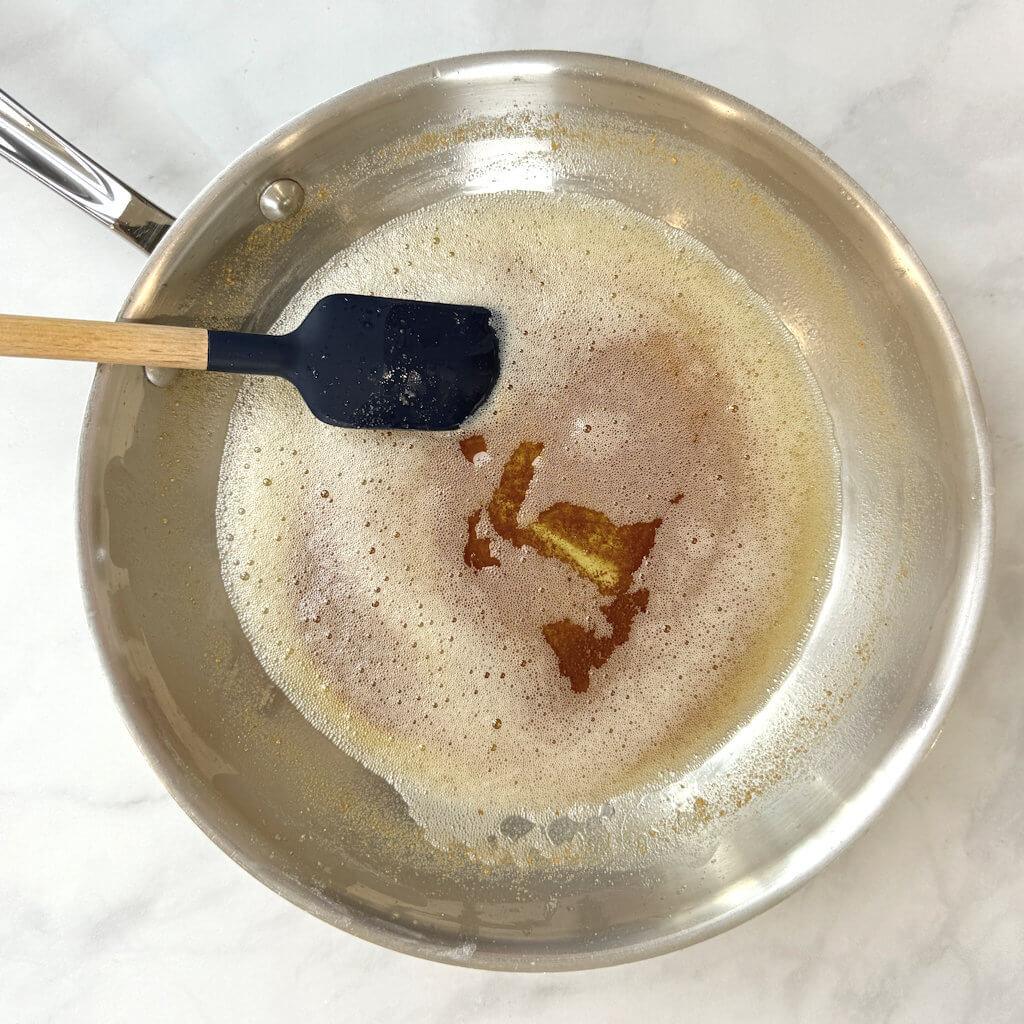
The process moves through distinct stages: the butter melts, starts to foam and crackle as the water evaporates, then the foam settles and the milk solids beneath it begin to turn from pale yellow to golden brown. That color change happens fast. A light-colored or stainless steel skillet makes it visible; a dark pan makes it easy to miss the moment and overshoot. Swirling and stirring continuously keeps the milk solids moving and prevents any one spot from burning before the rest catches up. The moment a nutty aroma fills the kitchen, the butter is done. Take it off the heat immediately and pour it into a heatproof container.
Brown butter can replace regular melted butter in almost any recipe, sweet or savory: cookies, cakes, pasta sauces, vegetables, eggs, and risotto all benefit from it. A light-colored skillet is the right tool, cutting the butter into uniform pieces before it goes in ensures even browning, and the brown bits at the bottom are not a problem, they carry a great deal of the flavor and can be strained out only if the recipe calls for a completely smooth result.
This post may contain affiliate links, which means that I make a small commission off items you purchase at no additional cost to you.
What is Brown Butter?
Brown butter is butter that’s heated until its water evaporates (butter contains about 15% water) and its milk proteins and sugars (specifically lactose) turn brown. This process of browning is called a Maillard reaction, a chemical interaction between amino acids (protein elements) and sugars that results in a darkened color and a variety of flavor compounds. This reaction is similar to caramelization, which only relates to browning of sugars (think about creme brûlée).
I believe that the expression ‘Everything is better with butter’ holds water, but in many recipes where you need melted butter, brown butter will make everything even better (and that holds no water, because it is evaporated).
Watch the process come together in this short video below, step by step before you start browning the butter.
How to Make Brown Butter
There is absolutely nothing to browning butter; everybody can make it; all you need is a little attention.
My advice is to choose a light-colored skillet or a stainless steel skillet. It’s not that you can’t use a dark skillet, like a cast-iron one; it’s just hard to see how much the butter browns.
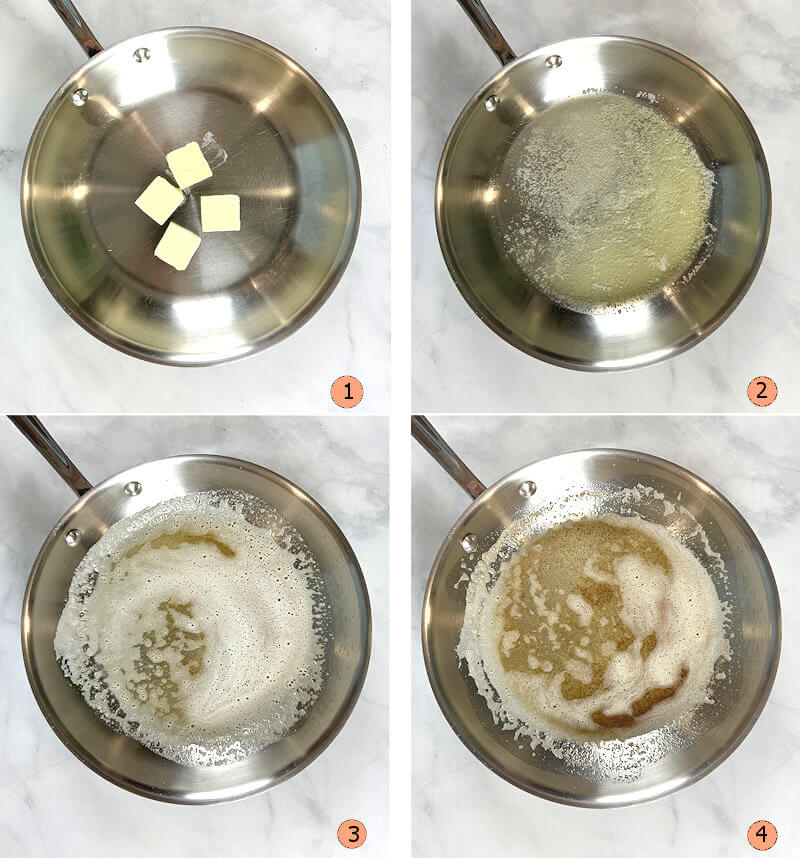
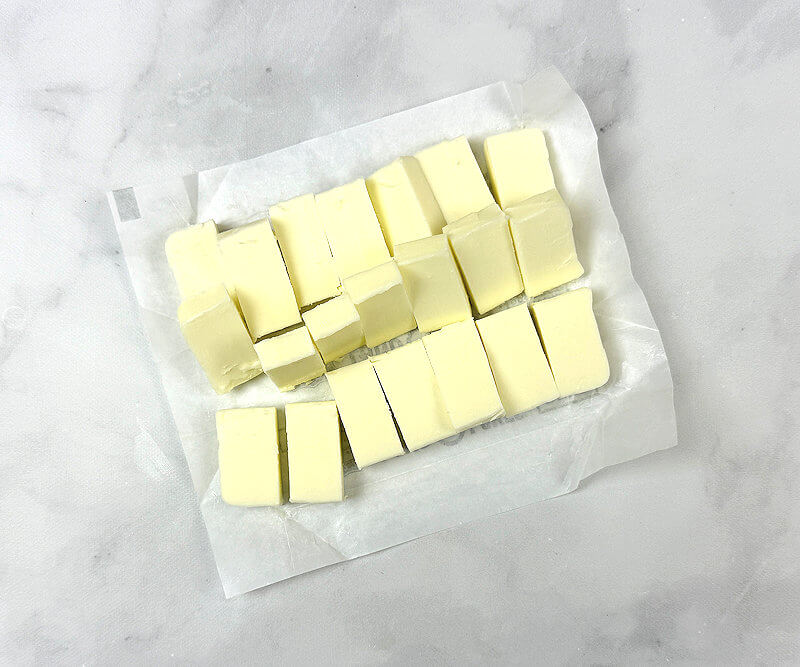
- Step 1 – Cut butter into small and uniform pieces so it heats evenly. Throwing a couple of stick of butter in a skillet make it easier, but you risk that one part of the butter is already melted and starts browning, while the rest is still solid.
- Step 2 – Melt the butter by swirling it in the pan. You’ll see that the butter starts foaming and crackling, sputtering and popping as water evaporates.
- Step 3 – Once the butter is melted, keep stirring (wooden spoon or rubber spatula); the butter will start foaming. Now the process will unfold fast. Keep on stirring; the milk solids will begin to toast, under the foam and change from yellow to light brown.
- Step 4 – Keep on swirling and stirring; this will prevent the brown bits from burning. Here you need to pay attention; brown butter can turn into burnt butter in a few seconds. Once you experience a nutty, and rich aroma from of the butter, you’ve reached your goal. Remove the pan from the heat and pour the brown butter in a heatproof bowl or jar that you can close (if you want to keep it longer than just for 1 recipe).
When to Use Brown Butter
Brown butter can be used to improve just about any recipe, sweet or savory, that calls for melted butter. A few examples:
IN SWEET RECIPES
- As ingredient in a lot of baking recipes, like cookies, cakes, muffins, banana bread, cinnamon rolls, frosting etc.
- Drizzled over pancakes or waffles.
IN SAVORY RECIPES
- Added to soups or roasted vegetables.
- Used as a sauce for pasta.
- Drizzled over fish, meat, eggs or vegetables.
- Stirred into mashed potatoes or risotto for extra richness.
Frequently Asked Questions
Yes, you can. However, salted butter may foam a little bit more than unsalted butter, so you may need to push the foam out of the way to see how brown the butter is.
No, you don’t need to, but you can. It depends on what you’re making. If you make a frosting and you prefer the color to be homogeneous then strain out the brown bits. I could also argue, that a frosting with these tiny brown bit may look stunning. For baking recipes, the brown bit will not be visible in the end product. When using the brown butter as a pasta sauce, the brown bits may just look fabulous.
One reason to definitely strain brown butter is when the butter burnt by mistake. Pour the melted butter through a cheesecloth, this will prevent the burnt milk solids to get into the butter and you can continue using it. It does have a slightly weaker flavor.
Absolutely. Transfer the brown butter to an airtight container and keep it frozen for up to 3 months.
Especially in baking recipes, the correct amount of butter and moisture is important. But if a recipes calls for brown butter as an ingredient, that recipes may already taken the loss of water into account.
If you want to replace butter with brown butter, there are 2 trains of thought.
1. Add 1 tablespoon of water or milk back into the recipe for every stick of butter (4 oz. = 1/2 cup = 8 tablespoons).
2. Make sure that you measure the browned butter the recipe calls for. E.g. 1/4 cup of melted butter, can be replaced with 1/4 cup of brown butter and thus you may need to brown more melted butter to get to 1/4 cup of brown butter.
These two solutions may not be foolproof and may require some testing.
Definitely. Browning cultured butter works the same way as normal butter. There is however a slight difference in the end product;
1. Cultured butter has a higher fat content than normal butter, so it yields more brown butter.
2. This culture adds a little bit of difference to the flavor.
Please keep in mind that cultured butter is more expensive than normal butter and you’ll need to weigh whether the price difference is worth the small practical differences.
How to Brown Butter
Materials
- Butter
Instructions
- Cut butter into small and uniform pieces so it heats evenly. Throwing a couple of stick of butter in a skillet make it easier, but you risk that one part of the butter is already melted and starts browning, while the rest is still solid.
- Melt the butter by swirling it in the pan. You’ll see that the butter starts foaming and crackling, sputtering and popping as water evaporates.
- Once the butter is melted, keep stirring (wooden spoon or rubber spatula); the butter will start foaming. Now the process will unfold fast. Keep on stirring; the milk solids will begin to toast, under the foam and change from yellow to light brown.
- Keep on swirling and stirring; this will prevent the brown bits from burning. Here you need to pay attention; brown butter can turn into burnt butter in a few seconds. Once you experience a nutty, and rich aroma from of the butter, you’ve reached your goal. Remove the pan from the heat and pour the brown butter in a heatproof bowl or jar that you can close (if you want to keep it longer than just for 1 recipe).