Make this bark during the weekend, buy some good chocolate, and take your pick of dried fruit, nuts, seeds. Combine nice flavors and colors on top of your chocolate of choice and your Dark or White Chocolate Bark will be ready for a gift or a special day at home.
This post may contain affiliate links, which means that I make a small commission off items you purchase at no additional cost to you.

Key Ingredients in This Recipe
You’ll find the complete list of ingredients and exact quantities in the recipe below.
- White chocolate
- Dark chocolate
- Dried cranberries
- Dried cherries
- Dried apricots
- Toasted coconut
- Pumpkin seeds
- Pine nuts
- Poppy seeds
- Pistachio nuts
How to Make Dark & White Chocolate Bark
OK, first quality chocolate, as with everything in cooking, quality is key. I know quality is very subjective and may depend on what you’re making. Buy the best chocolate you can afford. For this bark I selected white chocolate (not really chocolate in the true sense of the word, because it doesn’t contain cocoa powder) and dark chocolate. Coming from a country that makes chocolate, I love the really dark chocolate and went for the darkest I could find.
Step 1 – Line a baking sheet with parchment paper. Cut 2/3 of your chocolate in small pieces and melt that in the microwave or au-bain-marie or a double broiler (in a bowl in a saucepan with boiling water). I prefer the microwave, because it’s much faster, less risk of burning my fingers and no water drops landing in the chocolate. Melt the chocolate and remove the bowl from the heat and stir to cool it slightly.
The temperature of the white chocolate should be max. 100-110 degrees F and the temperature of the dark chocolate max. 115-120 degrees F, milk chocolate is in the middle. Now you can temper the chocolate if you want to, but it’s not a necessity. Especially for this bark, you may not even see it. Tempering chocolate is a process that will give your bark (in this case) a smooth and glossy look and the chocolate will break instead of bend.
How to temper. Once your chocolate has reached the required temperature, gradually add in the remaining chocolate to bring the temperature down, stirring vigorously and constantly. Stir until the temperature drops to 85 degrees F. (for white) and 90 degrees F. for dark chocolate. Voila – You have tempered chocolate.
Pour the white chocolate on one side of your baking sheet and spread it out, using max. half of your baking sheet. The other half is reserved for the dark chocolate.

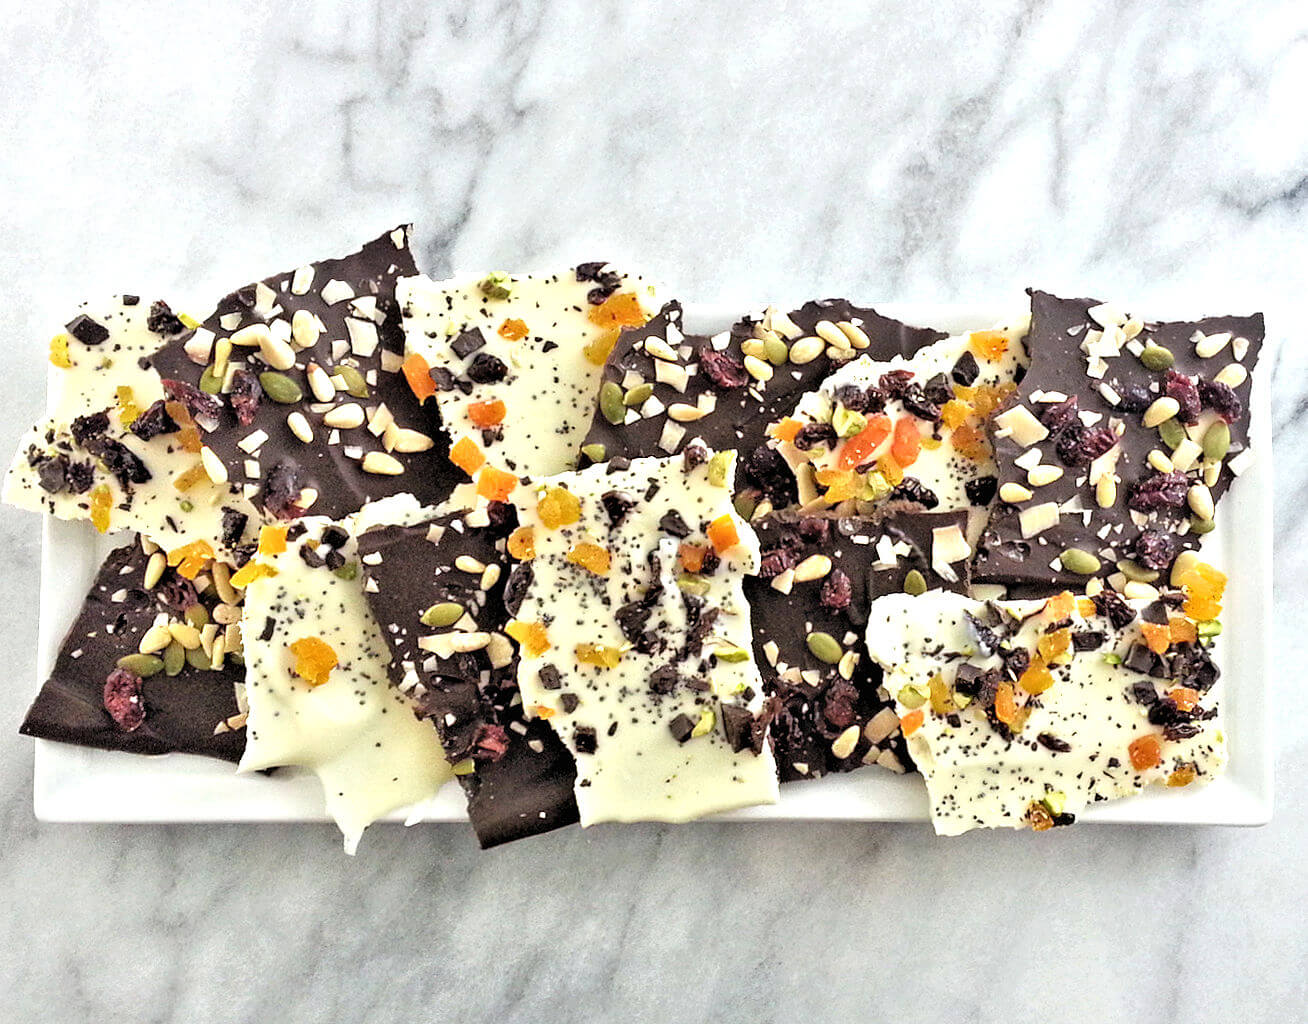
I spread the chocolate thin, because that’s the way I like it. Thin chocolate with loads of toppings is a nice nibble. Now it is time for topping, sprinkles. Use whatever comes to mind. I opted dried apricots and cherries, pistachios, and poppy seed for the white chocolate and dried cranberries, pumpkin seeds, pine nuts, and toasted coconut for the dark chocolate. In the recipe I have no quantities or weight for the topping, as it is up to you how much you want to sprinkle on top of the chocolates.

Dark & White Chocolate Bark
Pin Recipe FacebookIngredients
- 8 ounces white chocolate
- 8 ounces dark chocolate
- dried cranberries
- dried cherries
- dried apricots
- toasted coconut
- pumpkin seeds
- pine nuts
- poppy seeds
- pistachio nuts
Instructions
- Line a baking sheet with parchment paper and make each chocolate bark separately.
- Cut toppings in small pieces and mix topping for each chocolate in a bowl.
- Cut the white chocolate in small pieces.
- Place chocolate in a heat resistant bowl that will fit in a saucepan. Bring the water to a boil and place bowl in saucepan (bowl should not touch the water). Melt the chocolate and make sure no water gets into the bowl. Gently stir the chocolate until it reaches approx. 100-110 degrees F. Alternatively, you can heat the chocolate in the microwave. Remove bowl from saucepan and add remaining chocolate and fold this into melted chocolate. This will take about 15 minutes, depending on the quantity of chocolate you're working with. Temperature should be around 85 degrees F for white chocolate.
- Pour chocolate over half of baking sheet and spread with spatula.
- Sprinkle toppings you selected over the chocolate before it sets
- Repeat process for your dark chocolate. Melt chocolate until approx. 115-120 degrees F and temper chocolate until temperature reaches approx. 90 degrees F.
- Place baking sheet in a cool place or refrigerate. Allow to set for approx. 12 hours before you cut it or break it in pieces.
Nutrition
Nutrition information is automatically calculated, so should only be used as an approximation.